Tutorial - Add a Payment
If you are using Leavins Inventory Manager's 'in-store credit' feature, you will need to add customer payments to the system. This tutorial will instruct you on how to create a new payment.
1. Go to the 'New Payment' page
If you are not already at the Home Page, please click on the Home Button (the house near the top of the screen).
On the Home page, there is a large link that says "New customer payment." Please click on this link.
You should now be at the Payment page, and it should look like this:
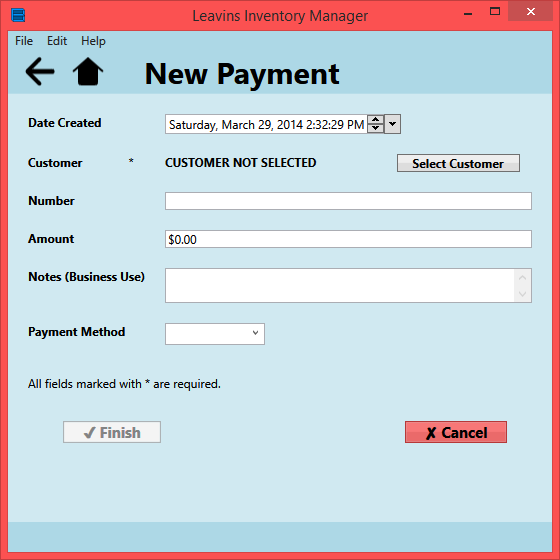
2. Select Customer
There is a button near the top of the page that says "Select Customer." Clicking it will allow you to select a customer. You need to select a customer. Otherwise, you cannot save the Payment.
The 'Select Customer' page should look like this:
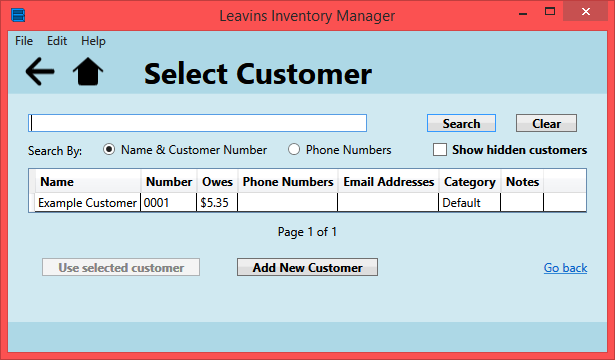
To select a customer, click on a customer in the table, and click the 'Use selected customer' button at the bottom of the page.
You should now be back at the Payment page.
3. Add Payment Details
The most important thing to fill-out next is the payment amount. Just click on the text-box to the right of the label that says "Amount," remove the amount that's in there, and enter the payment amount.
The payment is now finished and you can go ahead to the next step. But you may want to add additional payment details. Currently, Leavins Inventory Manager allows you to enter the following data:
- Payment Transaction Number
- Notes (Business Use)
- Payment Method
4. Click 'Finish'
At the bottom of the page, there is a button that says 'Finish.' Click it to save the transaction & exit the Payment page.