Tutorial - Add an Order
1. Go to the 'New Order' screen
Are you already at the home page?
If you are already at the home page...
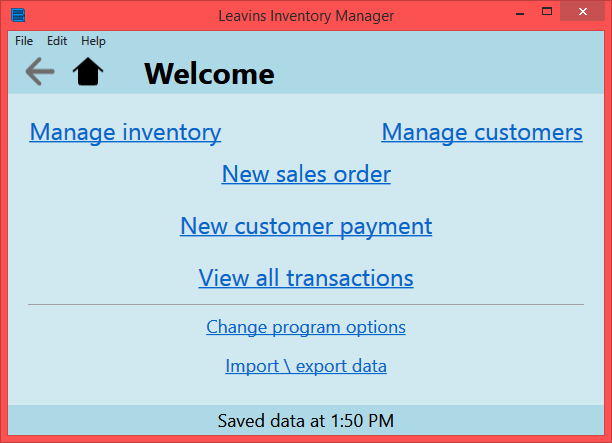
Click on the link that says 'New sales order.'
If you are not at the home page...
Please click on the Home Button (the house near the top of the screen). Click on the link that says 'New sales order.'
You should now be at the order creation page. When you check customers out, you go to this page to enter their items, print a receipt, and save the order for future reference.
The order screen has two major parts: a list of items that you have shared with Leavins Inventory Manager (located on the left side of the screen), and the customer's order (located on the right side of the screen). Below the customer's order, there are 'Checkout & Save' and 'Cancel' buttons; you might have to scroll-down in Leavins Inventory Manager to see these buttons.
Order creation is a simple six-step process:
- (Optionally) select a customer
- Enter items
- (Optionally) enter shipping & fees, payment method, or notes
- Click on 'Checkout & Save'
- (Optionally) print a receipt
- Click 'Finish'
The rest of this tutorial will walk you through this six-step process.
2. (Optionally) Select a Customer
By clicking on the 'Select Customer' button, you can select a customer to associate this order with. This is important if the current customer has a discount with your business, purchases tax-exempt items (usually for reselling), or wants to charge the order's total to an in-store credit account.
Click the 'Select Customer' button sends you to a page where you can select a customer. The top of this page has a search bar where you can search for a customer by name and customer number, and you can also search for customers by phone number. To select a customer for the order, click on the person's name in the list and click on the 'Use selected customer' button at the bottom of the page.
From this 'Select Customer' page, you can add a customer. I have provided information on how to add customers in Leavins Inventory Manager.
3. Enter items
Leavins Inventory Manager allows you to add items in three different ways:
- Select an item from the list on the left & click the 'Add ->' button.
- Click & drag an item from the left list to the right list
- Search for an item by its exact number (it's automatically added on the right)
If you need to remove an item from the list, just select it on the right-side list and click on the '%lt;- Remove' button.
4. (Optionally) enter shipping & fees, payment method, and/or notes
If your customer wants to use in-store credit, you can click on the box that says "Is On Store Credit." When the order is finished, Leavins Inventory Manager will automatically update the customer's account balance. If this checkbox is disabled, this means that you have not selected a customer. Step 2 of this tutorial provides information about customer selection.
If the order is on store credit, the Payment Method box will automatically be disabled because the transaction is on in-store credit. If your customer is paying with a Debit Card, Credit Card, or other form of payment, you can enter it into the Payment Method box. Leavins Inventory Manager does not process card transactions itself, allowing you to use your current process for taking credit cards.
If you need to add order information to the customer's invoice, click on the arrow that says 'Notes To Print.' A box will appear where you can enter any additional information.
If you need to add payment information (like the last 4 digits of the customer's card), click on the arrow that says 'Notes (Business Use).' This information will not be included in the printout of the order.
5. Click on 'Checkout & Save'
When you are finished entering order info, you can click on the 'Checkout & Save' button located at the bottom-right corner of the 'Order' page. Clicking this (when it's not grayed-out) will automatically save your new sales order and take you to the next page.
You should be at a page that shows a print preview of your order. If you instead see a page that says 'Warning - Transaction Total' in large letters at the top, this means that your order's total is $0 or less. On this warning page, you should probably click 'No' and adjust your order so that its total is greater than $0, then click on 'Checkout' again.
After clicking on the checkout button, your order will be saved. You can exit the program, and the transaction will be complete. You can now print a receipt for your customer and for your records. This process is covered in the next step of this tutorial.
6. (Optionally) print a receipt
At the print preview page, there is a button at the bottom of the page that says 'Print.' You may click this button, and then click the 'Print' button for the window that appears to print your order.
If the 'Print' button is disabled, there might be something wrong with the 'order format file' you created previously. This is not your fault! Computers can be very weird, especially when it comes to filling-out forms like the 'order format' one. Please contact Dustin Leavins if you run into a problem.
If Leavins Inventory Manager prints the order successfully, or you choose not to print the order at this time, you can move to the next step.
7. Click 'Finish (w/o Printing)'
Clicking 'Finish' will take you back to the home page. This button does not print the order.
If you forgot to print an order, or need to make changes to it, you can find it while on the home page. Just click on 'View all transactions' and Leavins Inventory Manager will show you a page where you can search through all of your orders and payments.