Tutorial - Add a Customer
1. Go to the 'Add Customer' screen
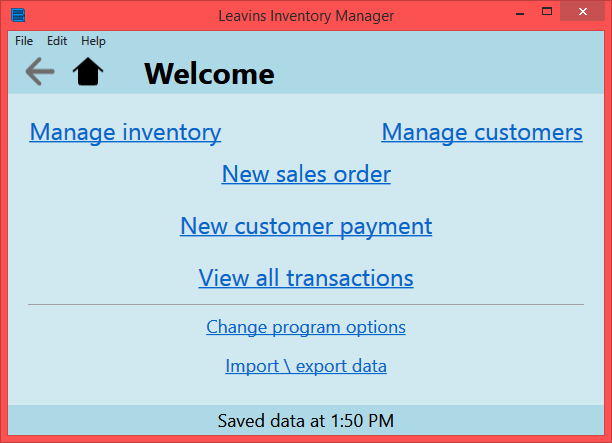
Are you already at the home page?
If you are already at the home page...
Click on the link that says 'Manage customers.'
If you are not at the home page...
Please click on the Home Button (the house near the top of the screen). Click on the link that says 'Manage customers.'
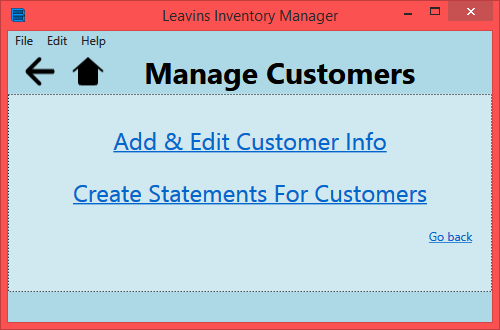
You should now be at the 'Manage Customers' page. Click on the link that says 'Add & Edit Customer Info', then click on the 'Add New Customer' button located at the bottom of the 'Customers' page.
2. Enter customer's name and (optionally) number category
You should now be at the Add Customer screen. It looks like this:
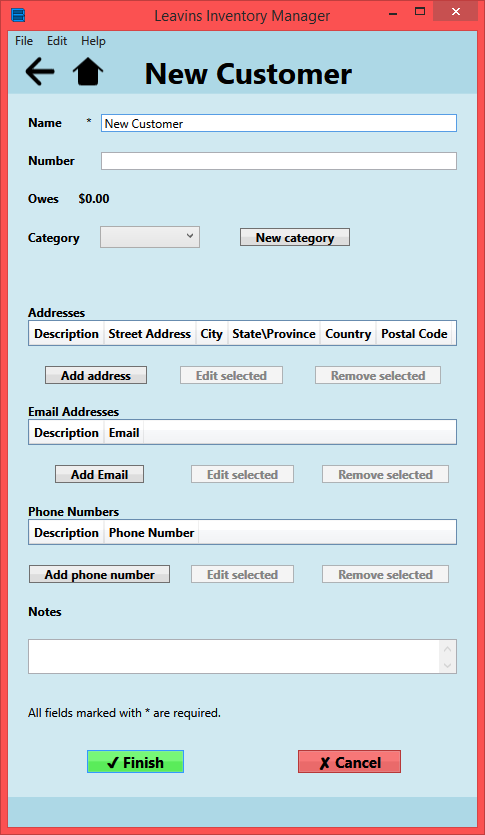
The only mandatory field for customers is the customer's name. You can put anything you want here, but you will likely want to use the customer's full legal name.
Customers can be given numbers. There is a field immediately below 'Name' for you to put a number for the current customer.
If you want to give this customer a percent discount on all items (as part of a loyalty program), or if this customer buys tax-exempt items, you need to choose a category for the customer.
You can optionally select a category for this customer.
Adding a customer category
If this is your first time adding a customer to Leavins Inventory Manager, you only have access to the 'Default' category. All customers without a selected category belong to 'Default', and they receive no automatic discounts or tax exemptions.
Click on the 'New category' button to open a page where you can add a new customer category. The interface is simple: name is required, and you can enter a default discount rate and tax exemption status. Click on 'Save' when you are finished creating a new category.
After you create a category, the current customer is changed to belong to that category. If the customer should not belong to this new category, click the box to the left of the 'New category' button and select a different category from the list.
If you decide that the customer needs a special category, you can change it later by going to the Customers page, selecting the customer, and clicking 'Edit customer'.
3. (Optionally) Add contact info and notes
You do not have to add any contact information, but you can use it later in customer searches and in end-of-month statements.
The customer creation page has three buttons: 'Add Address,' 'Add Email,' and 'Add Phone Number.' Clicking one of these buttons will take you to an appropriate data entry screen. On all three screens, red fields are mandatory fields. When you are done adding an address, email address, or phone number, click on 'OK' to continue & go back to the main customer creation page.
Near the bottom of the page, there is a 'Notes' field. Just type-in any information that you want to keep about the customer.